Disabling IPv6
If you suspect that you are having connection issues due to IPv6 being enabled, here are the steps to follow:
- First, to see if IPv6 is enabled open up a Terminal window and input the following command:
ip a
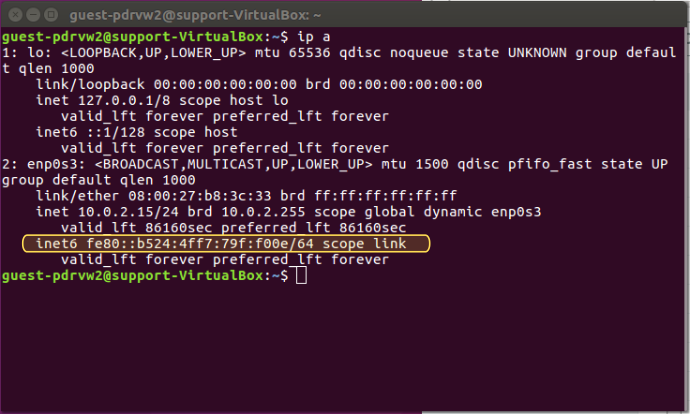
The Terminal will then display local addresses. Look for an entry that starts with "inet6" as highlighted in the screenshot below.

If you see an address like the one highlighted in the Terminal, IPv6 is enabled.
- To disable IPv6, enter the following three commands into the Terminal:
sudo sysctl -w net.ipv6.conf.all.disable_ipv6=1
sudo sysctl -w net.ipv6.conf.default.disable_ipv6=1
sudo sysctl -w net.ipv6.conf.lo.disable_ipv6=1
To verify that IPv6 is disabled, use:
ip a
Note: At this point, IPv6 is only temporarily disabled. The next time you re-boot, IPv6 will be active again. If you wish to permanently disable IPv6, use one of the methods outlined below.
Permanently Disabling IPv6
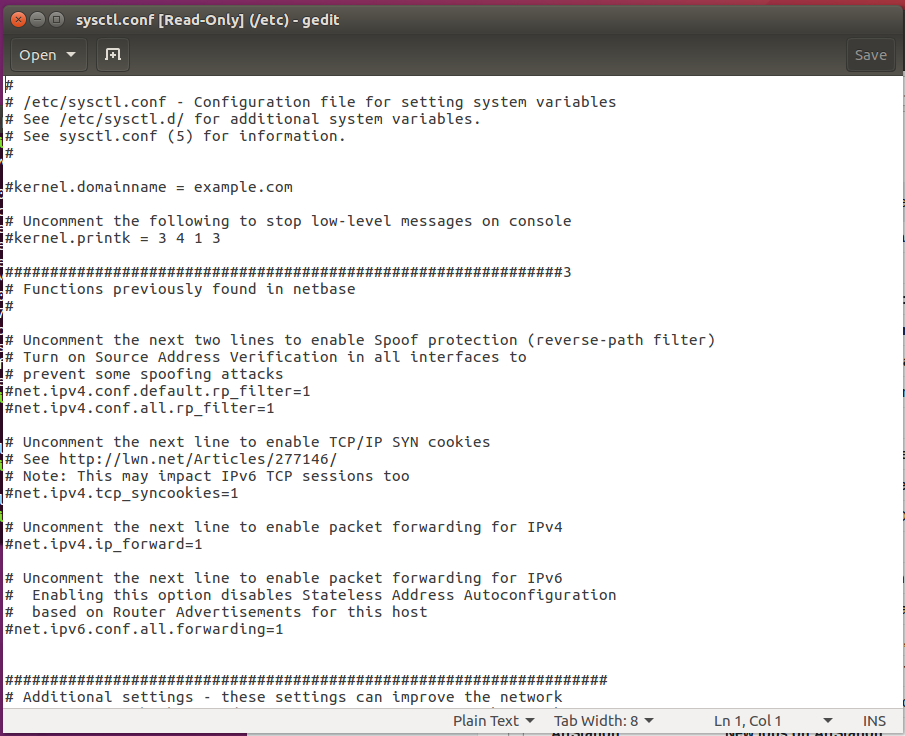
Method 1: Editing sysctl.conf
- Open /etc/sysctl.conf as Super User:
sudo gedit /etc/sysctl.conf

- Add the following lines of text to the file:
net.ipv6.conf.all.disable_ipv6=1
net.ipv6.conf.default.disable_ipv6=1
net.ipv6.conf.lo.disable_ipv6=1
- Save the file and enter the following command in the Terminal for the changes to take effect:
sudo sysctl -p
IPv6 should now stay disabled after a reboot or re-log.
Method 2: Editing GRUB
(Warning: GRUB, or GRand Unified Bootloader, controls your PC's boot process. It is very simple to edit, but do be careful with it because it is possible to cause Linux to not boot at all. VyprVPN is not responsible if anything goes wrong)
- You can edit GRUB so IPv6 is disabled as part of the system startup instructions. To modify GRUB, you start by editing /etc/default/grub as SuperUser using the following command from the Terminal:
sudo gedit /etc/default/grub
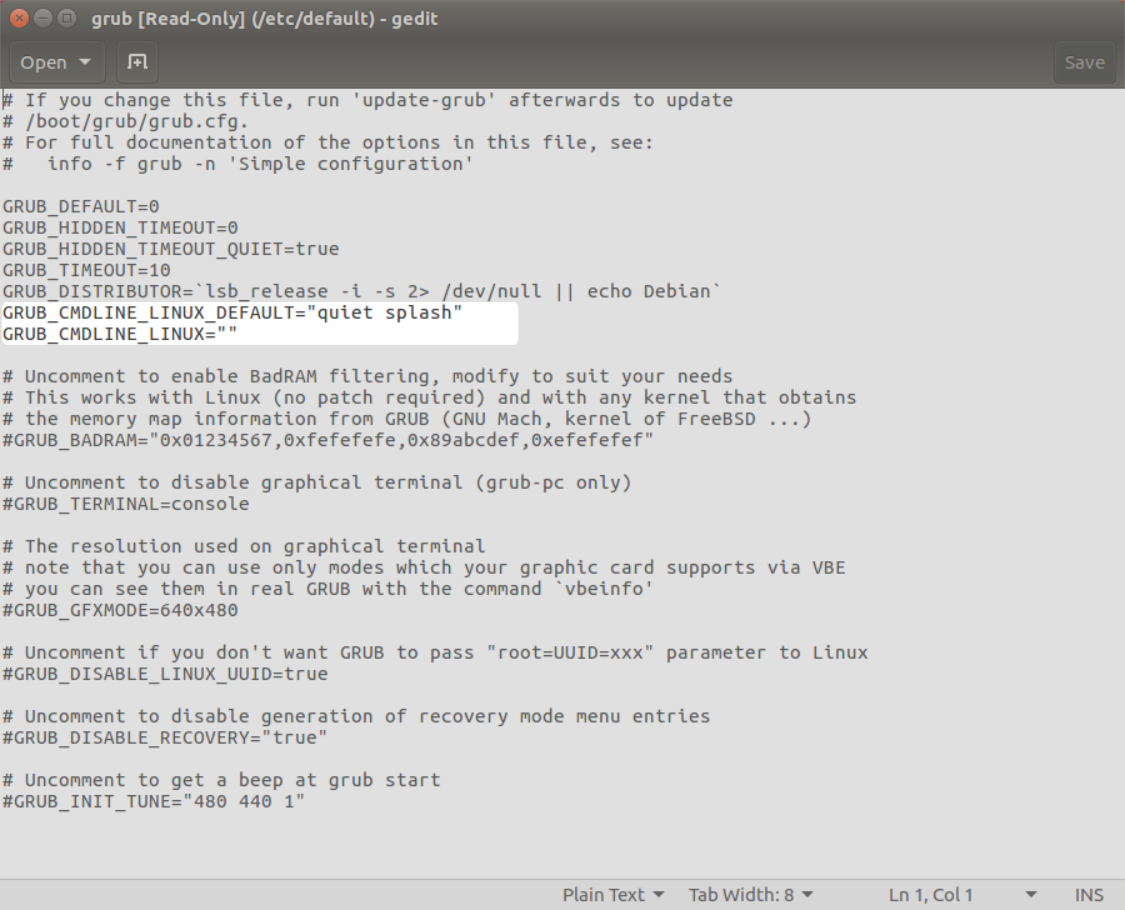
- You will see something that looks like this:

- Look for the two lines as highlighted in the image. The lines to modify are: GRUB_CMDLINE_LINUX_DEFAULT and GRUB_CMDLINE_LINUX as follows:
GRUB_CMDLINE_LINUX_DEFAULT="quiet splash ipv6.disable=1"
GRUB_CMDLINE_LINUX="ipv6.disable=1"
- Save the file and return to the Terminal and run the following command to update GRUB to reflect the changes:
sudo update-grub
Now, IPv6 will always be disabled on boot-up.
I've disabled IPv6 using one of the above methods.
How do I re-enable it?
Fortunately, it's as easy to enable IPv6 as it was to disable it! All you effectively need to do is undo the changes made.
- If IPv6 was disabled through the Terminal and you want to re-enable it without rebooting, enter the following commands in the Terminal:
sudo sysctl -w net.ipv6.conf.all.disable_ipv6=0
sudo sysctl -w net.ipv6.conf.default.disable_ipv6=0
sudo sysctl -w net.ipv6.conf.lo.disable_ipv6=0
- If you modified /etc/sysctl.conf as per Method 1, you only need to remove the three lines added to the file, or you can change the three lines to:
net.ipv6.conf.all.disable_ipv6=0
net.ipv6.conf.default.disable_ipv6=0
net.ipv6.conf.lo.disable_ipv6=0
After saving the changes, you may reload the values through the Terminal:
sudo sysctl -p
- If GRUB was modified per Method 2, you only need to return GRUB_CMDLINE_LINUX_DEFAULT and GRUB_CMDLINE_LINUX back to their original values and update GRUB.
- First, open up /etc/default/grub in a text editor as Super User and return the above-mentioned lines back to:
GRUB_CMDLINE_LINUX_DEFAULT="quiet splash"
GRUB_CMDLINE_LINUX=""
- Save and update GRUB through the Terminal
sudo update-grub
- Reboot and IPv6 will be enabled again
You can verify IPv6 is functional again with the "ip a" command.
If you need any further assistance, please contact our 24/7 Customer Success Team, who would be glad to assist.